Setting Up Document Generation
To generate a document when a form is submitted, you need to create a Legal Signing feed. This feed tells Legal Signing what to do with the submitted form entry to generate the document.
Creating a Legal Signing Feed
- Go to the Form Settings page on the form you want to generate a document for and click on the Legal Signing tab.
- Click the Add New button to create a new Legal Signing feed.
Selecting a PDF Template
When creating a new Legal Signing feed, you are presented with two settings: the feed name and the template selector.
Enter in a feed name that uniquely identifies this document configuration.
Select the template you added in the previous step from the drop down.
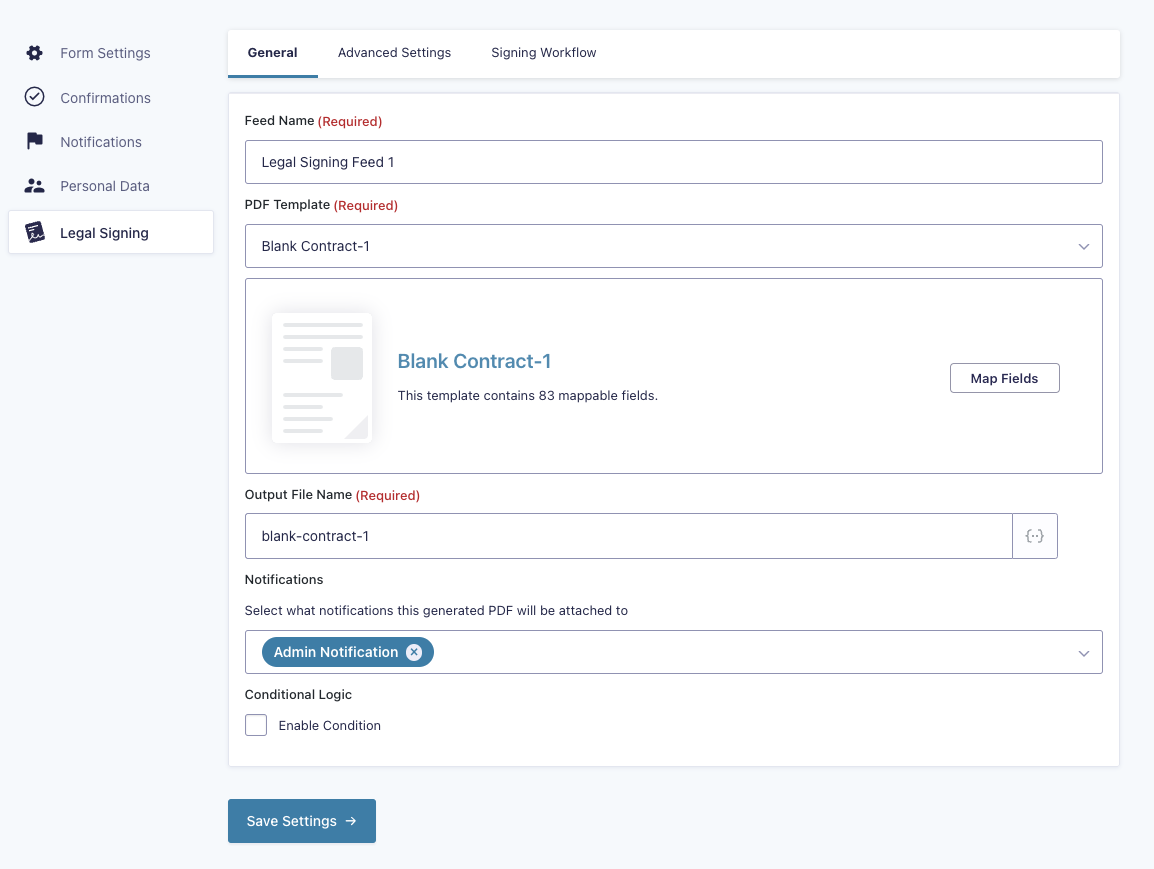
After you’ve selected the template, you’ll see a preview of the first page of your template beneath the drop down along with a couple new settings.
Using the File Name setting, you can set the name of the generated PDF file.
In the Notifications setting, you can choose which notifications to have the generated PDF automatically attached to.
You can also configure conditional logic to set up conditional scenarios where the feed will be run.
Mapping Template Fields
Now, we need to map our Gravity Forms fields to our template. Click the Map Fields button next to where your selected template is being highlighted.
Your screen will now be filled with the visual template mapper. Each page of your template will be displayed with all the available template fields that are available to be clicked on to set up mappings for them.
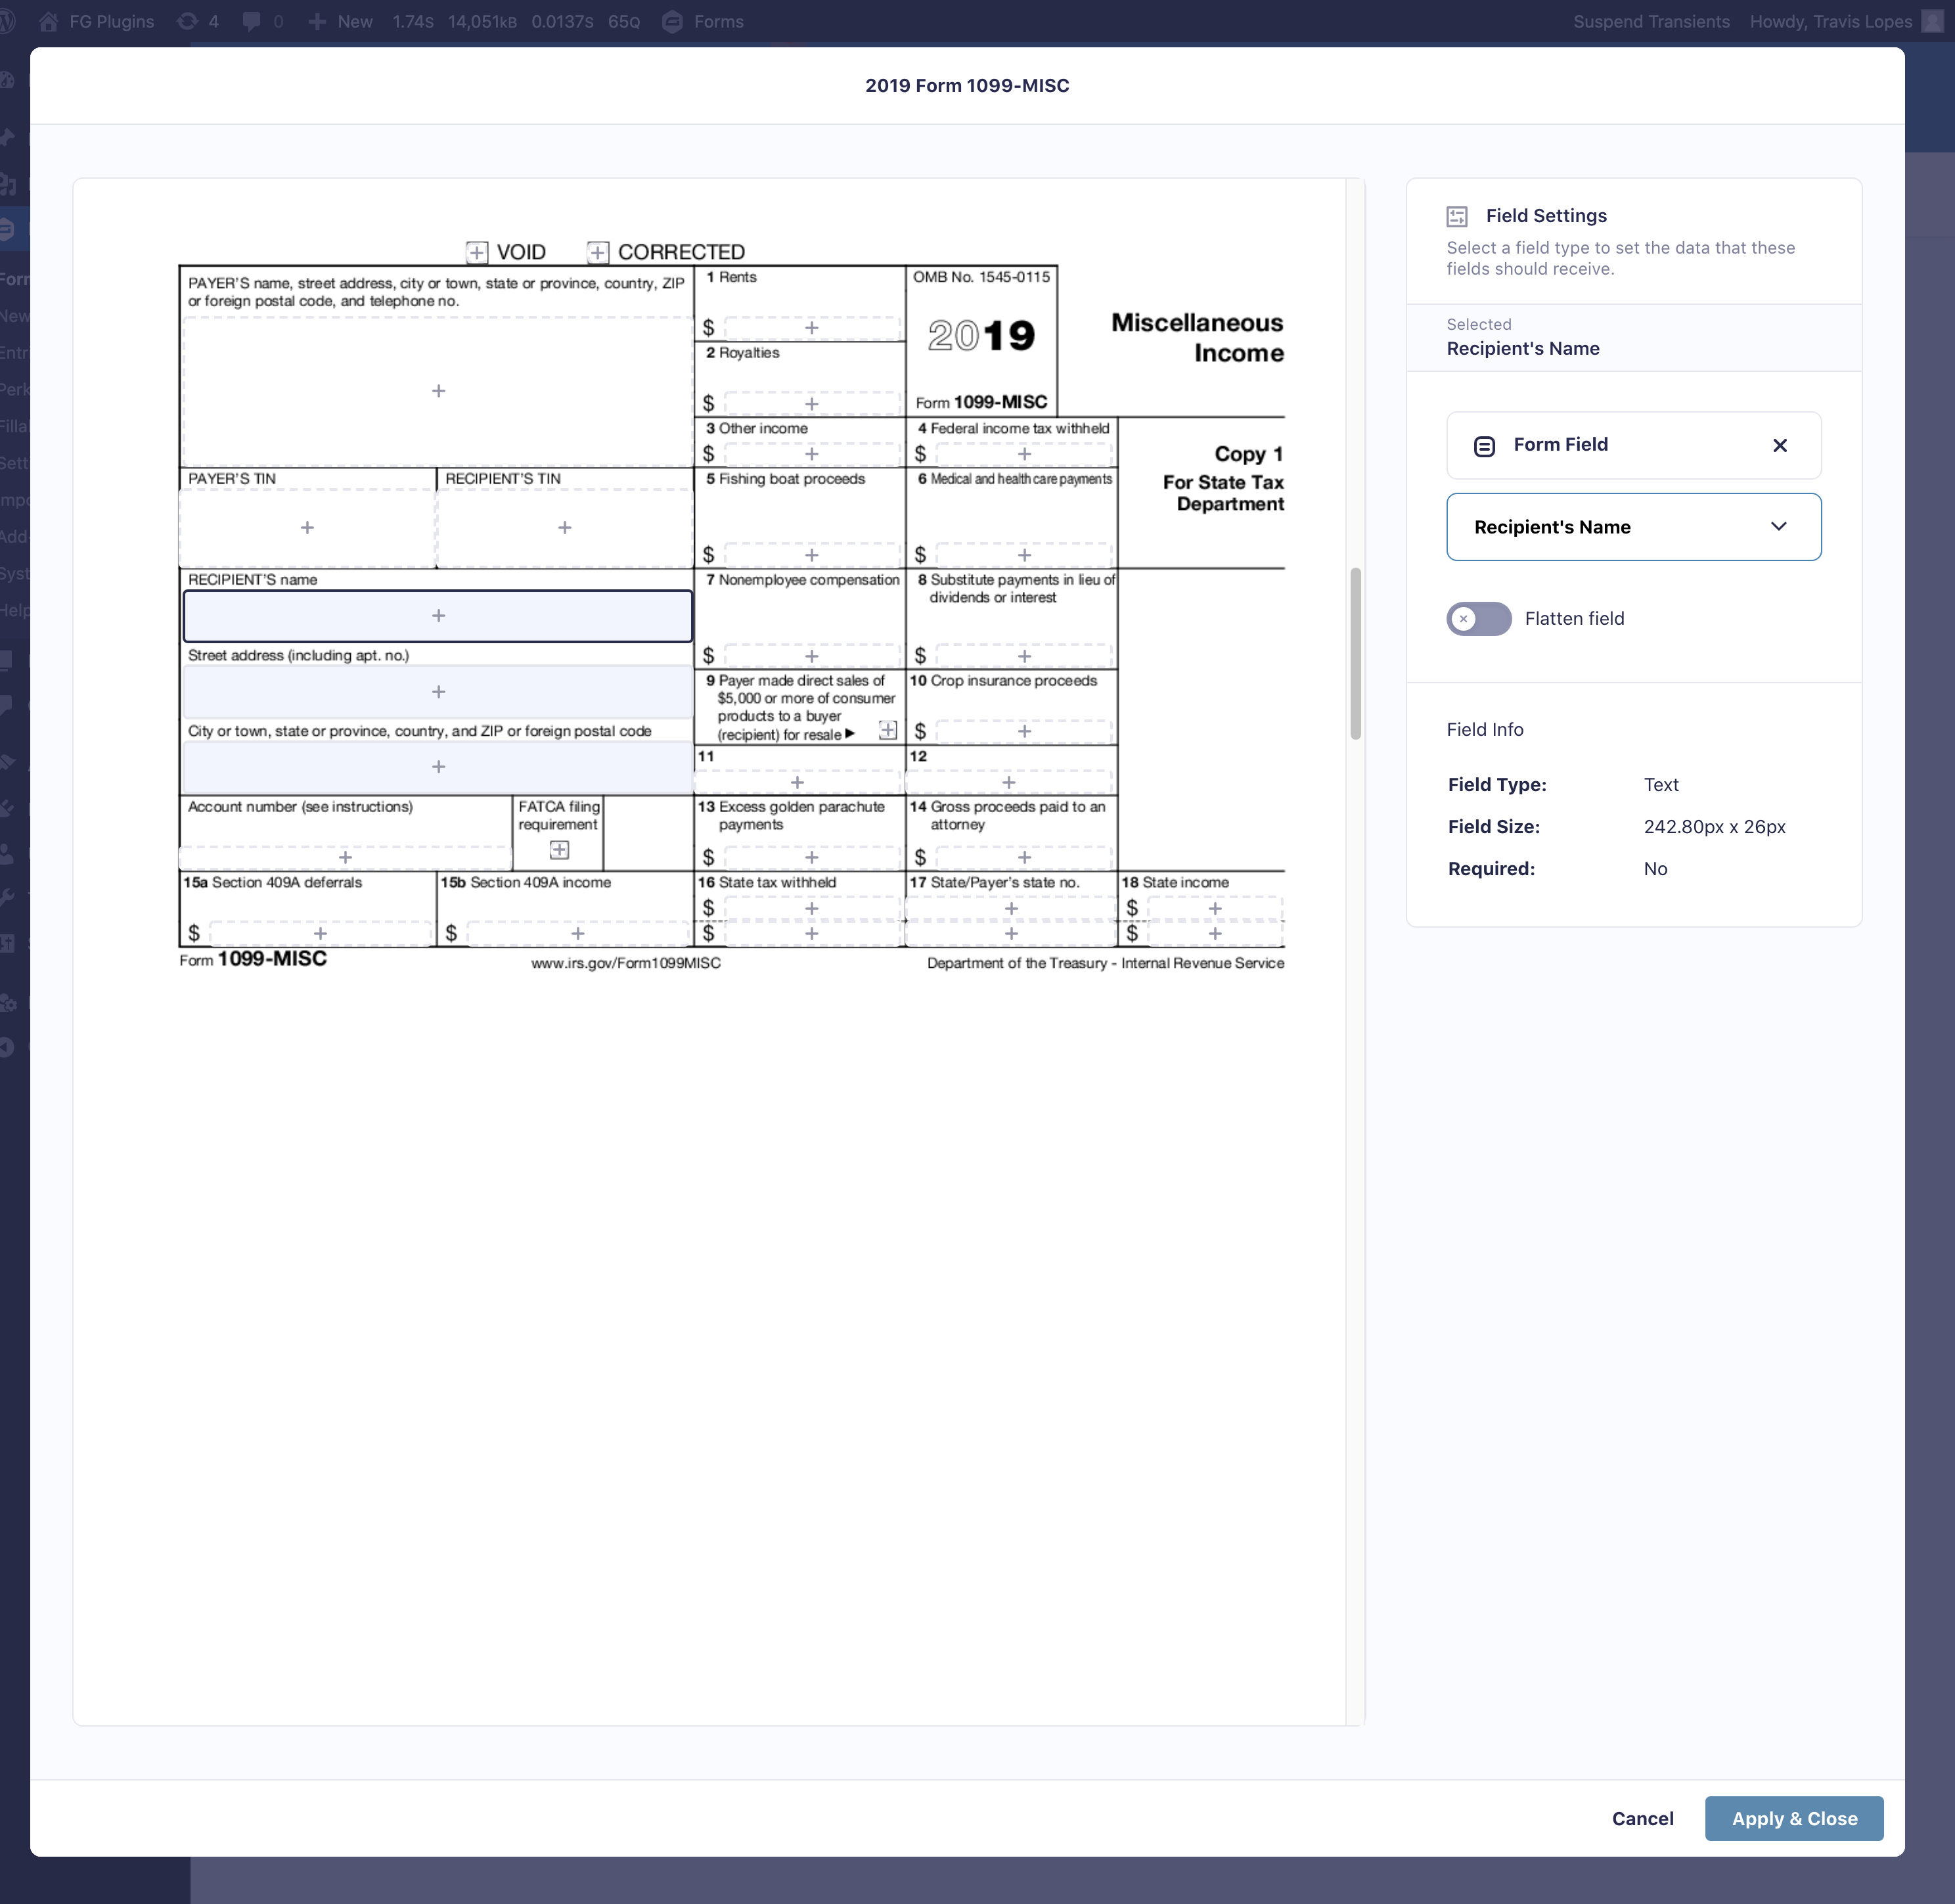
To map a Gravity Forms field to a template field, simply click on an available field in the template. The sidebar of the mapper will update allowing you to select which Gravity Forms field to map for that selected template field. You can also map Gravity Forms entry meta or a custom value using merge tags.
If you map a template field to a File Upload field, you’ll have the option to automatically embed the uploaded image into that template field. Signatures will automatically be embedded into mapped template fields.
Mapping fields with multiple choice inputs, like Checkbox and Radio Button fields, can sometimes require extra setup. Refer to the following articles for how to map to those field types:
Additional Settings
Once you’ve mapped all your Gravity Forms fields to your template, click the Apply & Close button in the bottom right corner of the modal to exit the visual template mapper. Be sure to also save your overall feed so your mappings get saved.
You can click on the Advanced tab to configure additional settings for the generated document, these mostly concern the security and permissions settings for the generated document.
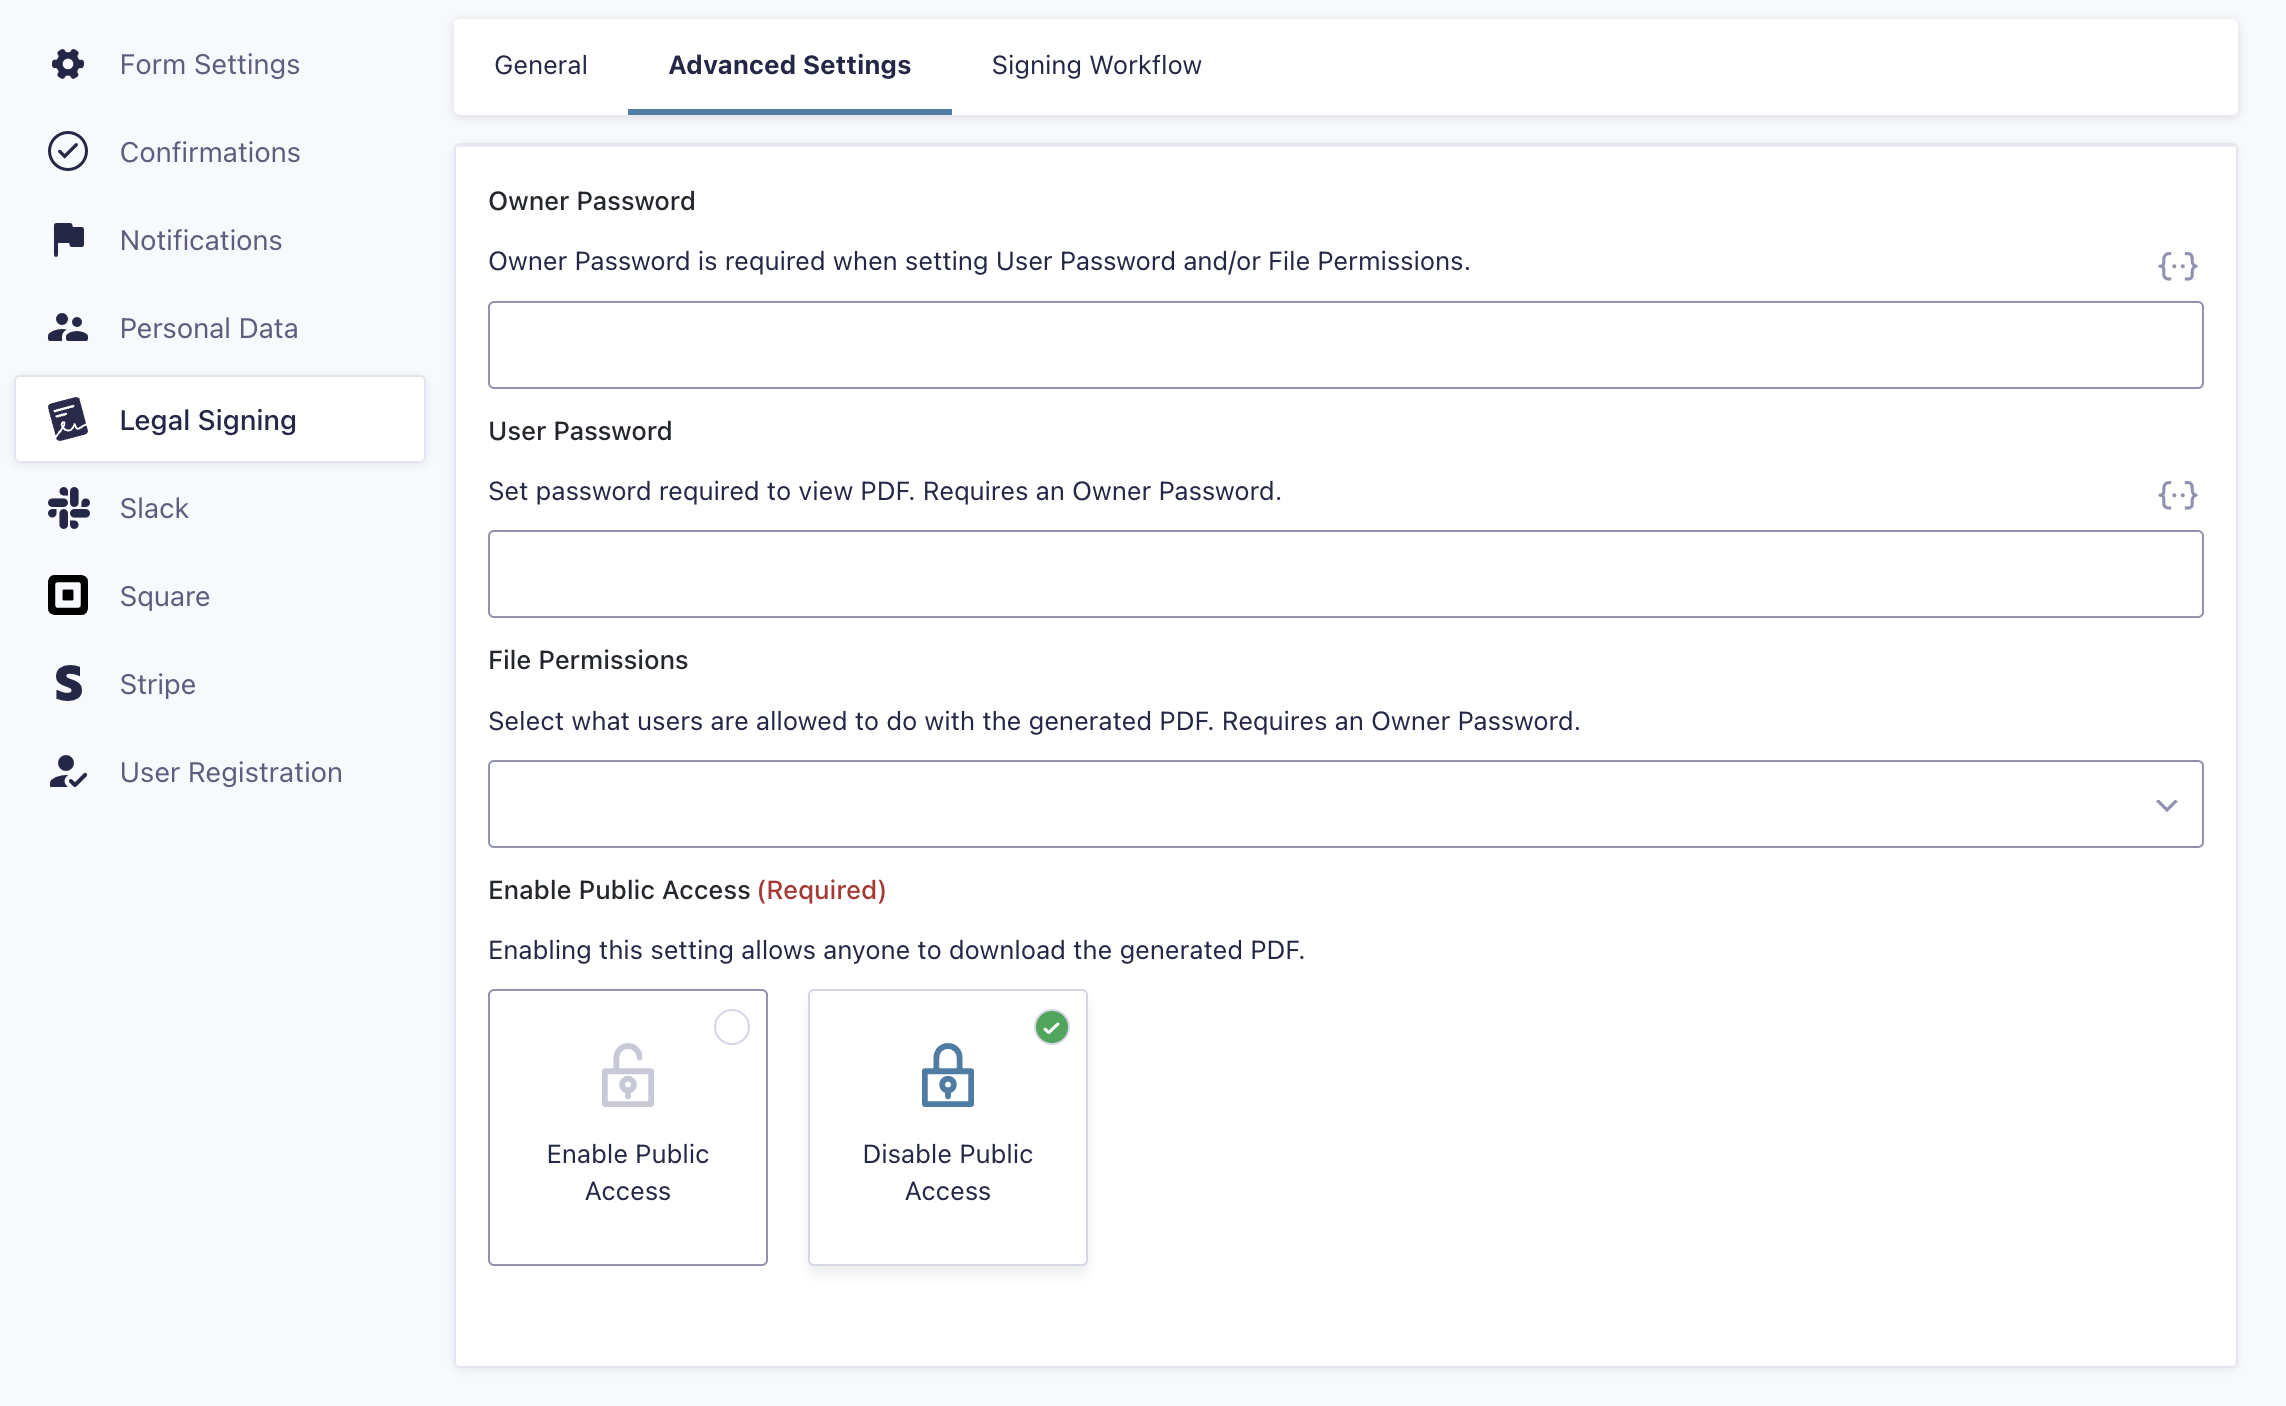
Passwords and Permissions
- The Owner Password setting allows you to set a password that is required to make changes to the security properties of the generated document when opened in a PDF editor or reader.
- The User Password setting allows you to password encrypt a generated document, requiring the user to enter this password to open it.
- The File Permissions setting allows you to control what the end user can do with the document, including if they can print, modify, or copy it.
Note: An Owner Password must be provided to utilize either a user password and/or set custom file permissions via the File Permissions dropdown. If no Owner Password is provided and the File Permissions dropdown is left blank, the generated document will be granted all available permissions by default.
The Enable Public Access setting defines if anyone who accesses the download link can download the generated document.
You can also choose to remove interactive form fields from the PDF, preventing the end user from making any modifications to the data entered.
Signing Workflow
The next step is setting up how your Legal Signing feed will handle the actual signing workflow tied to the document generation.
For a full breakdown on this see our Configuring Workflows documentation.