Configuring Workflows
The bread and butter of Legal Signing’s functionality is controlled in the Signing Workflow tab of your Legal Signing feed settings.
Here you’ll control all your important signing settings like who your signers are, how long they have to sign, what they see if the workflow expires before they sign, etc.
Creating a Legal Signing Feed
Make sure you’ve already created a Legal Signing feed or are in the process of creating one as this is where your workflows are also configured.
Enabling a Workflow for a Feed
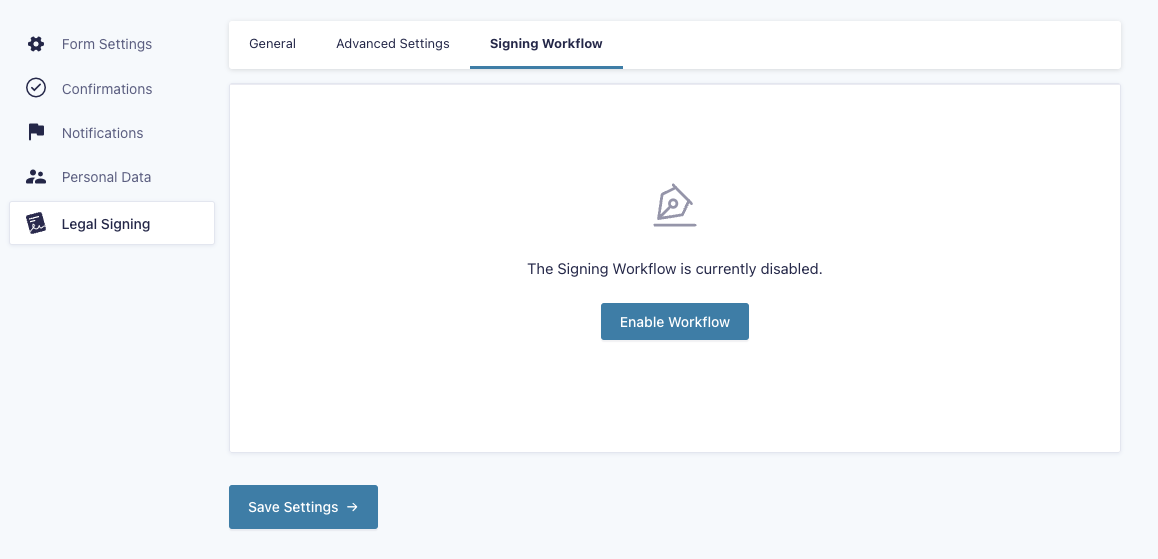
To enable a signing workflow for your Legal Signing feed, you’ll navigate over to the Signing Workflow tab of the feed settings screen and hit the Enable Workflow button.
In order to create a workflow the form must also have the following:
- At least one Email field that will be used to capture the initial signer’s email address.
- A Legal Consent field added to the form.
Note: You can currently only have one workflow per form. You can have multiple Legal Signing feeds and generate documents without a workflow, but only one of the feeds for the form may have an active workflow at the same time.
Signer Settings
Here you’ll control the order the signers will go through within the signing workflow.
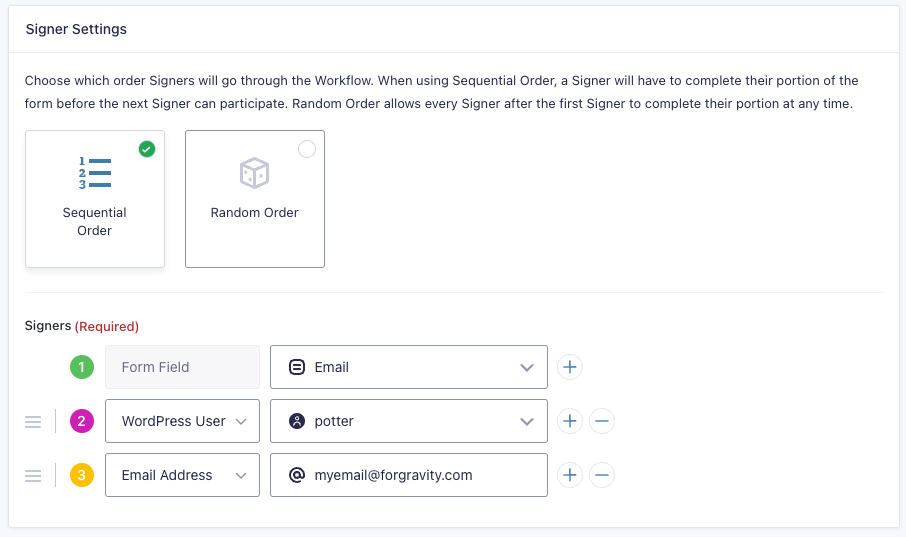
Signing Order
There are two options available to control in what order the signers will be instructed to sign during the workflow.
- Sequential Order – When one signer finishes, the next in the order will be instructed to sign.
- Random Order – All signers will be instructed to sign immediately and can perform their end of the signing at any time in any order.
Signers
You can add an infinite amount of signers to the workflow from a variety of sources using the plus and minus icons. The first signer in the workflow will always need to be the user submitting the initial form that kicks off the Legal Signing feed and its associated workflow, their email collected from an Email field on the form.
For additional signers, your options for sources are:
- Form Field – Must be an Email field on the form.
- WordPress User – The user’s associated email will be used.
- Email Address – A static email address.
Regardless of the source used, multiple signers cannot have the same email address within the context of a single workflow and signing session. You can use duplicate emails across multiple individual signing sessions, but each session must have signers that each have a unique email address.
Note: You can drag all additional signers once you have 3+ signers added via the available handle. The number associated with the signer will automatically update throughout the workflow settings after reordering. The initial signer cannot be reordered.
Form Field Assignment
This is where you’ll control which fields on the form each signer is responsible for signing on their leg of the workflow.
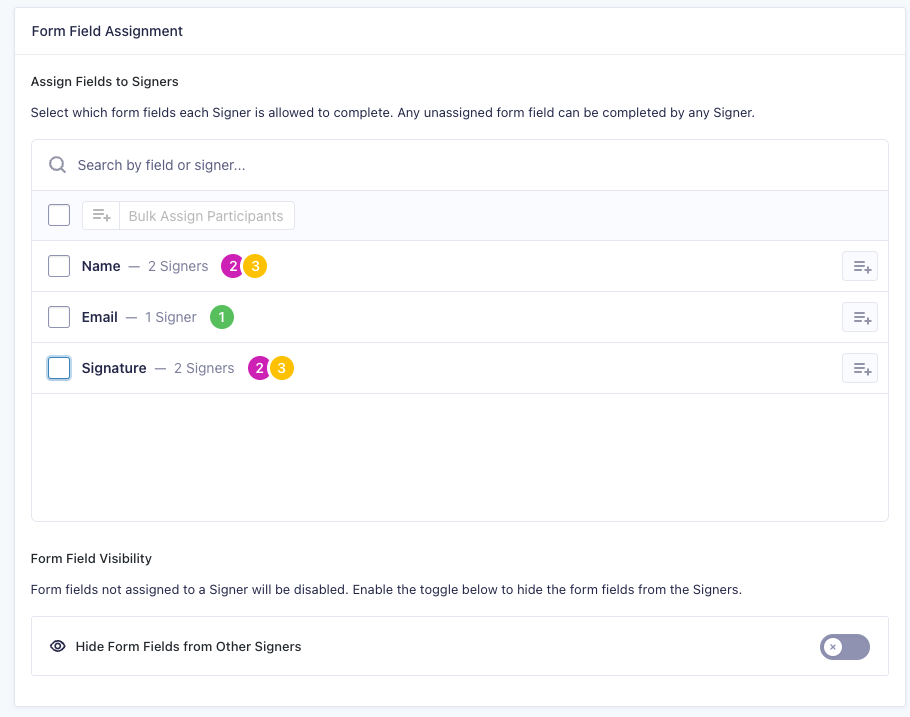
Assign Fields to Signers
You have a high level of control over which fields each signer will be tied to. You should have fields on your form specific to each signer, especially a separate signature field for each signer.
You also have the ability to assign multiple signers to a single field. When this happens the field will be treated as a collaborative field where each signer can see the value previous signers have entered for that field when signing and modify that value on the fly, updating it in the entry when they complete their end of the signing workflow.
You can both select multiple fields and use the Bulk Assign Participants button to assign signers to multiple fields at once or click the icon towards the right of each field in the list to individually assign one or more signers to that single field.
Note: Any Email fields that will be used to dynamically determine a signer’s email address (which is always mandatory for the initial signer) will always be automatically assigned to the initial signer and cannot be unassigned or assigned to a different signer. This is because all signer email addresses must be known at the time the initial signer submits the form and creates the signing session.
Form Field Visibility
This toggle allows you to control whether or not the user will see all fields when they view the link sent to them to sign, or just the fields you’ve assigned them here in the workflow. This is especially useful if you have a large number of fields in the form that aren’t relevant for a certain signer to see or fill out, you can just display the fields you’ve assigned the current signer.
All signers will be automatically assigned the Legal Consent Field.
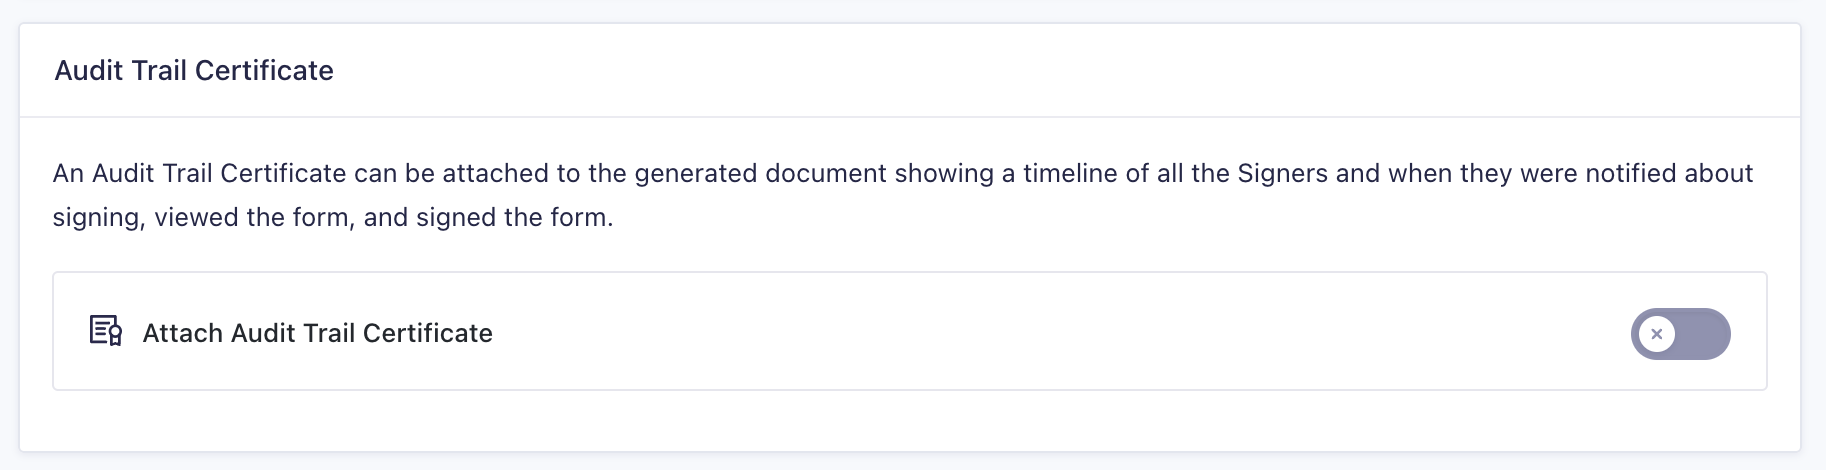
Audit Trail Certificate
When toggled on, this setting will insert an audit trail certificate at the end of the generated document. This will contain information on when each signer logged an event as part of the signing session.
The audit trail is always available from an administrative standpoint when viewing the associated entry in Gravity Forms, this setting will just add it to the document as well.
Signing Schedule
This settings module gives you the ability to modify the length of time all signers have to complete the workflow. If a workflow expires it will not complete and generate a document if all signers have no completed their end of the process by the due date you’ve set here.
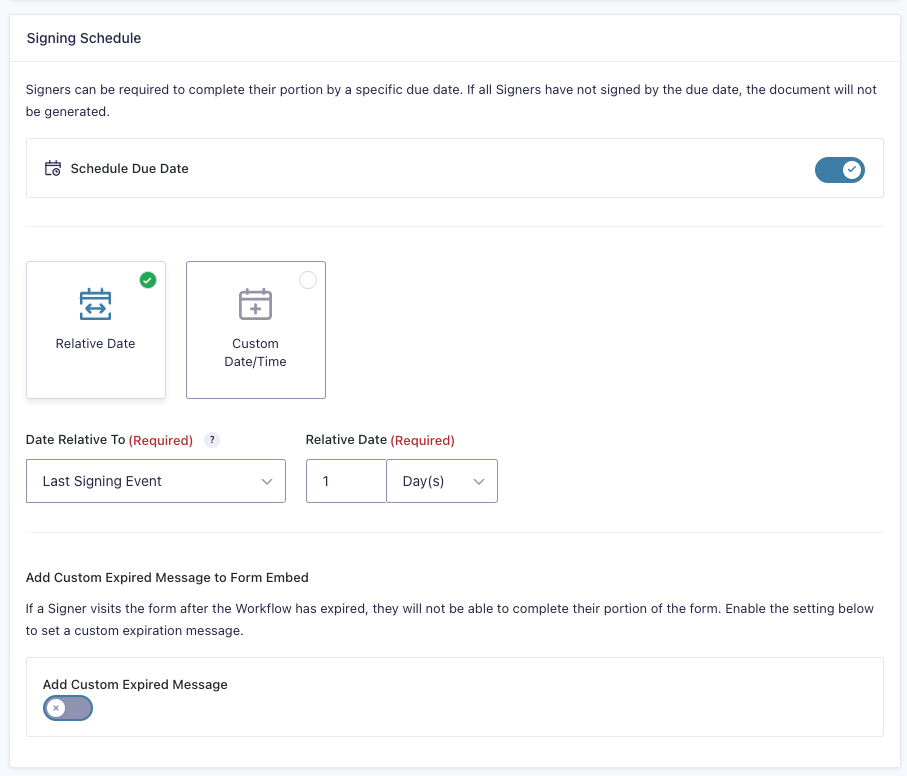
Relative Date
Setting a relative due date lets you set a dynamic due date, this can either be relative to:
- Initial Form Submission – The date and time the form was initially submitted and kicked off the Legal Signing feed and its workflow. This is the same date and time noted on the entry created in Gravity Forms
- Last Signing Event – The date and time the last signer in the workflow successfully signed. You can use this setting to bump out a dynamic timer after each signer completes their end of the workflow, e.g. your workflow is set to run in sequential order and you want each signer to have 2 days to sign. If you set the expiration to be 2 days from the last signing event, the expiration date will get bumped out 2 days each time a signer completes their end of the session. If that 2 days passes from the last event, the entire session expires.
With a relative due date, you can enter any custom amount of minutes/hours/days/weeks/months.
Custom Due Date
This setting gives all signers an absolute due date of the date you set via the date and timepicker available here.
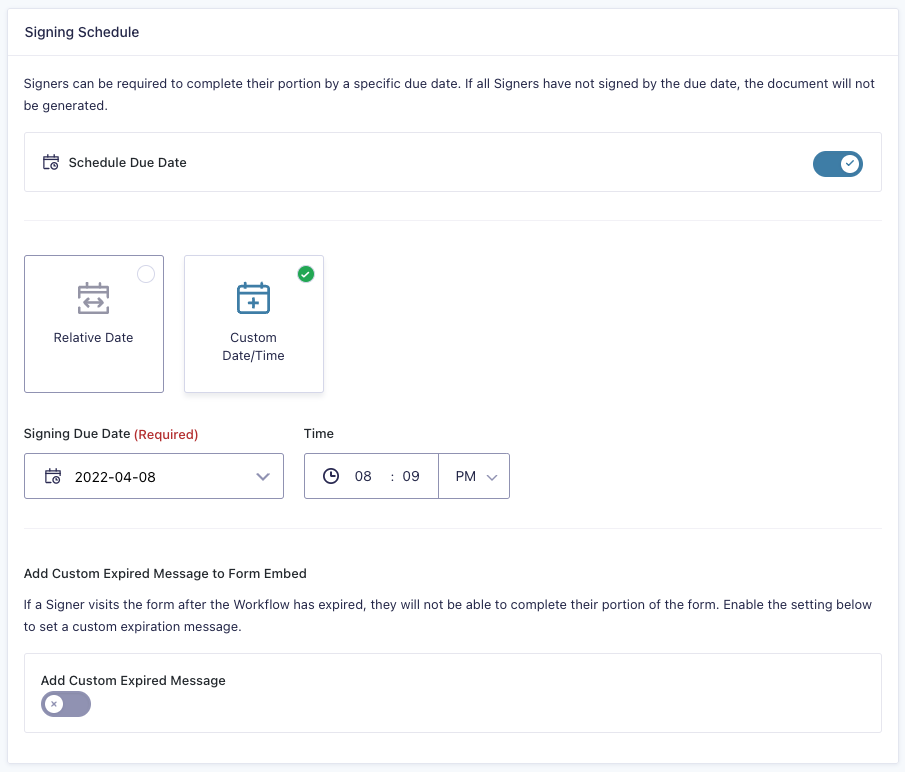
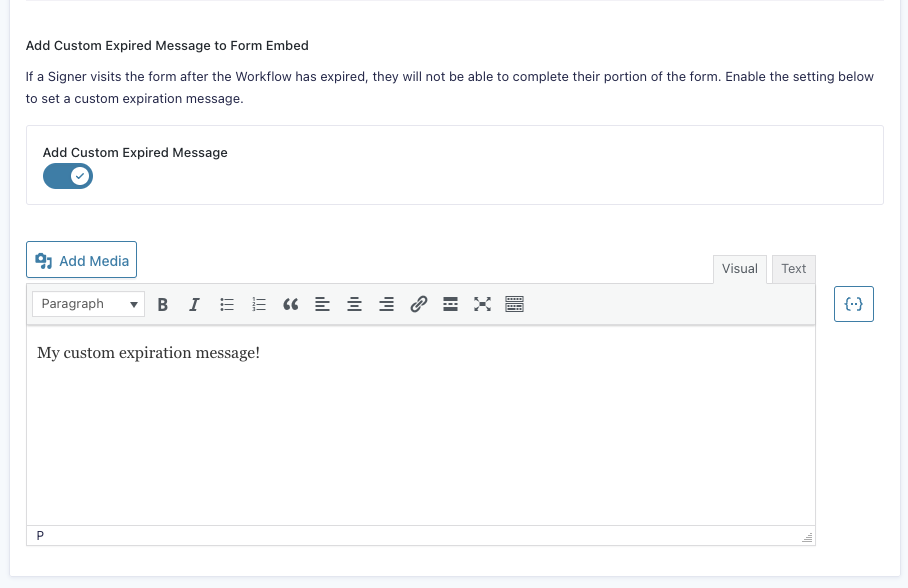
Custom Expired Message
When a signer attempts to access a link they’ve been sent to sign after the due date has passed, they will see a message stating the workflow has expired. We inject a pretty standard default message, but if you’d like to set a custom one you can do so via this toggle and the text editor available when enabled.