Setting Up a Delete Entries Task
Introduction
A Delete Entries Task allows you to delete entries from your form in a more advanced manner than what is available in Gravity Forms by default.
Whether you’re looking to delete manually, on a schedule, or on each form submission Entry Automation has you covered. In this documentation article we’ll walk through all the core settings modules available when setting up an Delete Entries Task.
Configuring General Task Settings
The General settings tab of a Delete Entries Task contains most of the baseline settings you’ll use to set up the framework of the task including items like the Task type, how often your Task will run, and what entries will get deleted when it runs.
Task Settings

Here you’ll configure a few baseline settings of the Task including its name and what basis you’d like it to run on. To get started:
- If desired, rename the Task from the default generated name.
- Select your Task type. You can choose between the following options:
- Manually – The Task can only be run manually via the “Run Task Now” button available when editing a Task.
- Scheduled – The Task will run on a schedule that is configured within the Task.
- On Form Submission – The Task will run each time the form is submitted.
- If Save and Continue is enabled for the form, you can also switch between targeting entries and Save and Continue draft submissions.
Automation Action Settings
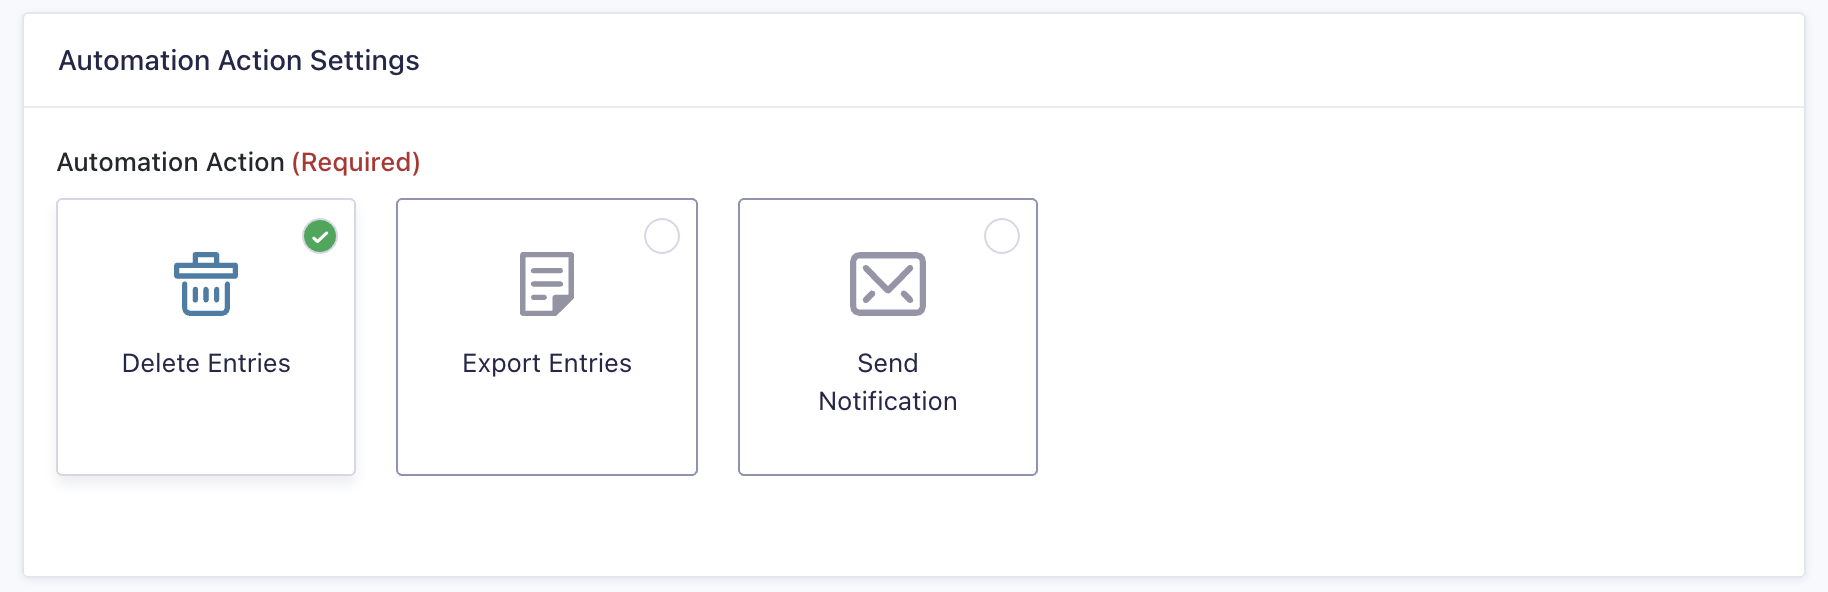
This section allows you to select what you want your Task to do, since we’re talking about Delete Entries here you’ll want to select the Delete Entries choice.
Our documentation on Export Entries Tasks can be found here.
Schedule Settings
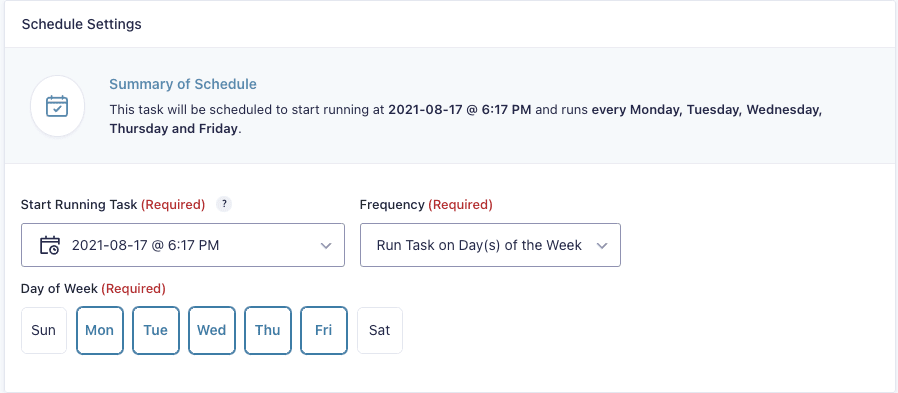
If running a Task with the Scheduled type selected, the Schedule Settings section will be available in the General settings tab.
Here you can control how often and when the Task will run and delete your entries.
- Set your desired first run time for the Task, all future Tasks will begin running relative to this time based on the frequency you choose.
- Configure your frequency the Task will run in the Frequency dropdown. You can choose from:
- Run Task Every… – Allows you to set a custom interval of Minutes, Hours, Days, Weeks, or Months at which the Task should be run, e.g. every 1 Hour or every 2 Days.
- Run Task on Day(s) of the Week – Allows you to set which days of the week the Task will be run, e.g. you can set up a Task that only runs every Monday, Wednesday, and Friday.
- Run Task on Day(s) of the Month – Allows you to set which days of the month the Task will run, e.g. you can set up a Task that only runs on the 1st, 15th, and 31st of each month. (Note: In this example if the current month has less than 31 days the Task will still run on the correct equivalent day relative to the amount of days in the month.)
- Once you’ve configured your schedule, you’ll want to double-check the Summary of Schedule at the top of the settings box to verify the description of the schedule output there matches your desired schedule.
Target Entries Settings
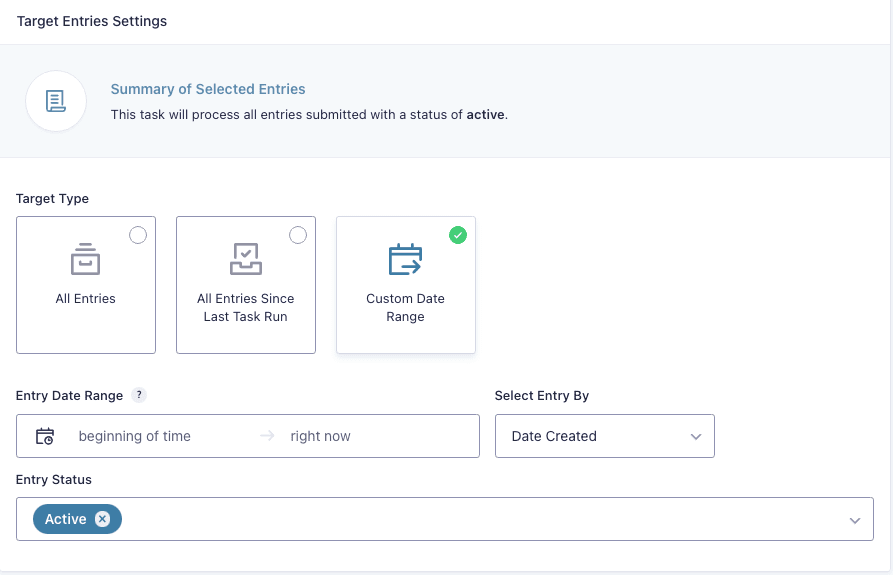
When using a Manual or Scheduled Delete Entries Task, you’ll have the Target Entries Settings section available to you in the General settings tab.
Here you’ll have a few options to determine which entries will be deleted when your Task runs, all three have a common Entry Status setting for further filtering:
- All Entries – Includes all entries.
- All Entries Since Last Task Run – Includes all entries that have not been processed since the last runtime of the Task occurred.
- Custom Date Range – Allows you to set up a custom date range to determine which entries should be included in the deletion. For more detail on this setting, please see our documentation on Understanding the Date Range
Configuring Delete Settings

The Delete Settings tab contains the settings that tell the Task what entry data is deleted for processed entries.
Here you can choose whether you’d like the Task to delete the entire entry or just individual fields within the entry while keeping others. If you’re using Fillable PDFs you can also select PDFs for deletion by their feed name.
Note: When selecting file upload fields for deletion, the associated files on the server will also be deleted in addition to the value in the entry.