Uploading Export Files to Dropbox
Using the Dropbox Extension for Entry Automation, your entries can be sent to your Dropbox account after the export file has been generated.
Installing Dropbox Extension
Dropbox Extension can be installed from the Entry Automation plugin settings page, found in the Gravity Forms Settings section. After you’ve entered in your license key, a list of available extensions will be listed. If your license does not have access to the Dropbox Extension, an “Upgrade License” button will be available to get access to the extension.
Click the “Install Extension” button next to the Dropbox Extension to download it to your WordPress site. Then, click the “Activate Extension” button to activate the extension.
Authenticating with Dropbox
After activating Dropbox Extension, refresh the Entry Automation plugin settings page. There will be a new “Dropbox Settings” section with a “Click here to authenticate with Dropbox.” button. Click the button to authenticate with Dropbox. After going through the Dropbox authentication flow, you will be brought back to the Entry Automation plugin settings page and have been successfully authenticated.
Setting Up Dropbox Exports
When Dropbox Extension is activated and you have authenticated with Dropbox, a new Connection Settings tab is added to the Entry Automation task settings screen when setting up an Export Entries task.
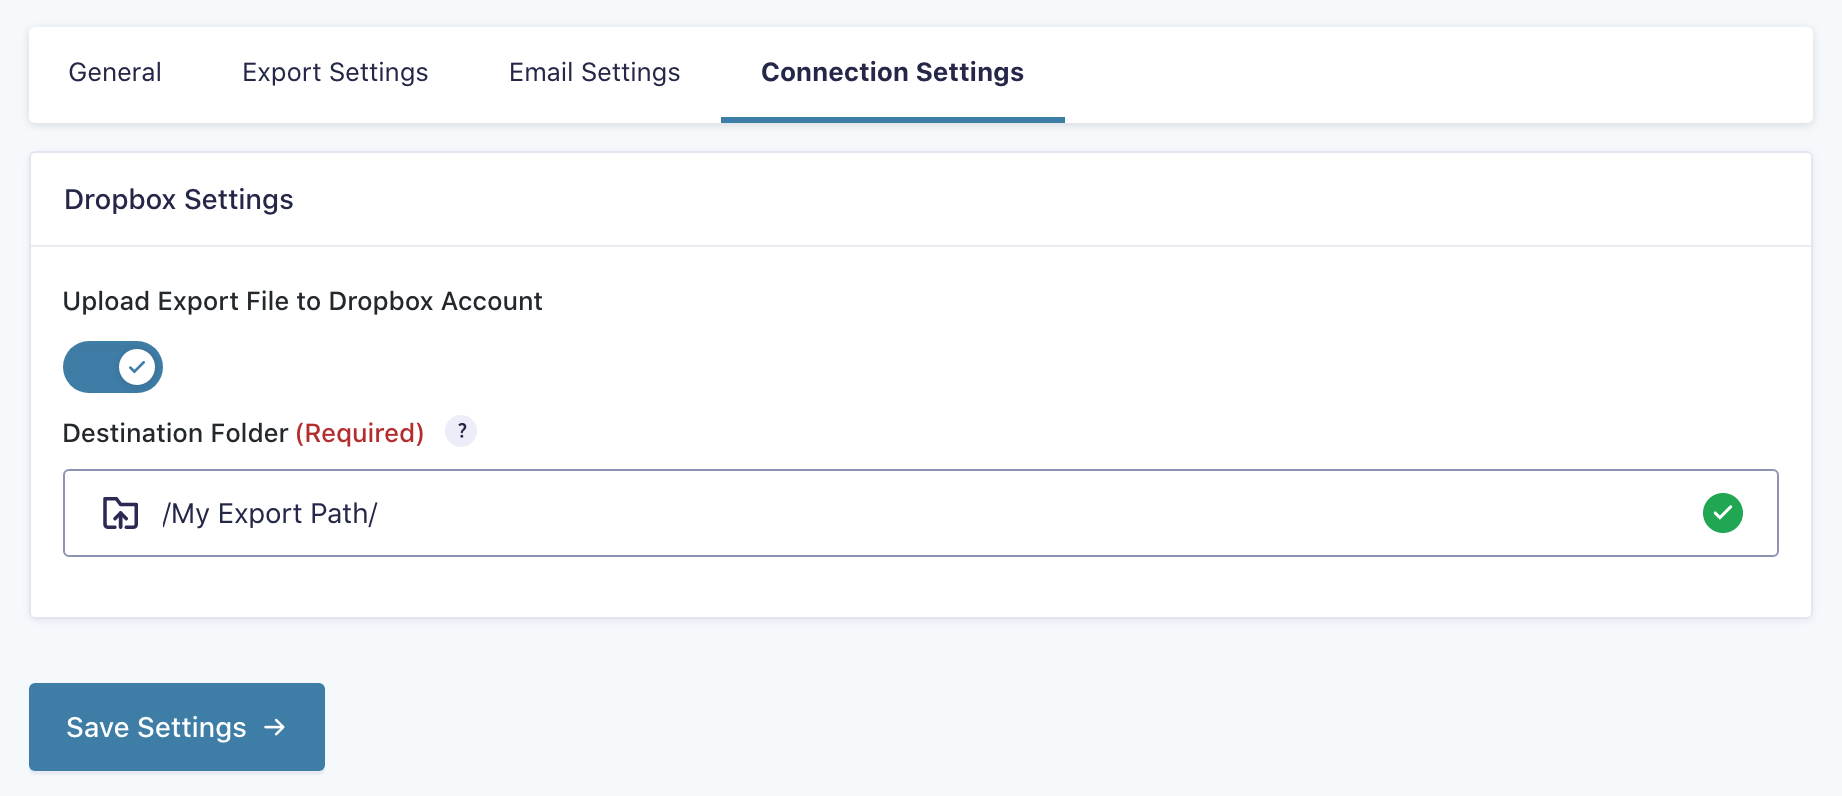
The Connection Settings tab contains a Dropbox Settings section. Enter the destination path for where the export file should be uploaded to in your Dropbox account. Live validation is provided to ensure the export file is able to be uploaded to the defined path.